|
|
|
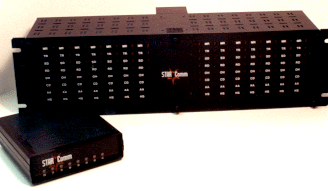
password and caller ID protection security modem Whether you are trying to protect configuration ports on remote equipment or control access to your private network, the StarComm 3342S family of security modems is the right solution. With the wide range of features and options available in the 3342S family, you can select from economical solutions for basic security requirements or powerful feature sets for complex security issues:
:
Whether you are trying to protect configuration ports on remote equipment or control access to your private network, the StarComm 3342S family of security modems is the right solution. With the wide range of features and options available in the 3342S family, you can select from economical solutions for basic security requirements or powerful feature sets for complex security issues:
3342S Security Modems – All models offer an AT compatible command interface and support the following modulation standards: V.34, V.32bis, V.32, V.22bis, V.22, V.23, V.21, Bell 212A and Bell 103J. All models feature password protection, caller ID protection and audit trail capabilities with precision time keeping.
jump to Security Modem Software Manual PDF filejump to DC power connections diagram (NOTE power plug polarity - center pin is positive and the out side of 5.5 barrel connector is negative) see other password and caller ID protection security modem pages visit our other Star-Comm modem pages jump to StarCom modem main page
For All Security Modem Models THEORY OF OPERATIONAN OVERVIEW OF PASSWORDS AND CALLER ID KEYS - All StarComm security devices maintain a non-volatile database of passwords and/or Caller ID keys, which grant access to facilities of the security device and to devices attached to the RS-232 port(s) of the security device. Each password or Caller ID key may be granted specific levels of access through associated parameters. Since certain models offer unique access control parameters, it is important to familiarize yourself with the specific features of your device before using Device Manager. However, you will find that all StarComm security devices offer the following three basic levels for Passwords and Caller ID keys: LEVEL 1 - This level of password or Caller ID key will be granted access to devices attached to the security device. LEVEL 2 - This level of password or Caller ID key may access devices attached to the security device. In addition, this level allows the user to configure all parameters of the device, including the security database. LEVEL 3 - This level of password or Caller ID is reserved for use by the Device Manager software. Any device that will be managed by Device Manager must contain a Level 3 password or Caller ID. When a security device is accessed through its Level 3 password, it enters a special communications mode that is required by Device Manager. Please note that when password security and Caller ID security are both enabled, any level associated with the Caller ID key is ignored and the level associated with the user password takes precedence. MANAGING PASSWORDS AND CALLER ID KEYS - Device Manager was designed to simplify the task of defining and maintaining the password/Caller ID database of many security devices in a large installation. It does so through a relational database structure that assumes many devices must contain the same set of passwords and Caller ID keys. The three major components of the Device Manager database structure are: * The User Group Table - Device Manager allows you to define as many as 99 unique user groups. Each user group is identified by a unique alphanumeric name and a unique user group number. * The Device Table - The device table associates each device with a user group. This table also defines the location and telephone number of the device. * The Password or Caller ID Table - For each user group, you must define a set of valid passwords and/or Caller ID keys that will be maintained in the non-volatile database of all devices associated with the user group. The maximum number of passwords and Caller ID keys that may exist in the database of any group is limited only by the maximum capability of the particular security modems that have been defined within a user group. MANAGING THE DEVICE AUDIT TRAIL - All StarComm security devices maintain a non-volatile audit trail of all successful and unsuccessful attempts to access the device. Each record of the audit trail contains date, time, password or Caller ID key, and status. Device Manger allows you to collect and consolidate the audit trail contents of any or all devices in a user group. The resulting table may then be exported for report generation or archive purposes. THE MAINTAIN USER GROUPS SCREEN Within Device Manager's security database hierarchy, all devices, passwords and Caller ID keys must be defined within a specific user group. Therefore, definition of one or more user groups must be the first step in developing your security database. The MAINTAIN USER GROUP screen allows you to add, delete or modify user groups records in the user group table of the Device Manager database. A user group record is comprised of the following fields: * User Group Number - Numeric value between 1 and 99. * User Group Name - Alpha numeric field of 20 characters or less. The tool bar at the bottom of the screen provides icons for addition, deletion or modification of records. A description of each tool bar function may be displayed by placing your mouse cursor over a specific icon. THE MAINTAIN DEVICES SCREEN The MAINTAIN DEVICES screen allows you to add, delete or modify device definition records in the device table of the Device Manager database. Since each device must be defined within a user group, you must first scroll to the proper entry in the user group window on the left side of the screen. Once a user group has been selected, all devices associated with that user group will appear in the device definition window on the right side of your screen. You may then add, delete or modify device definition records. A device definition record is comprised of the following fields: * Location Name - Alpha numeric field of 25 characters or less. * Telephone Number - Numeric field of 15 characters or less The tool bar below the device definition window provides icons for addition, deletion or modification of records. A description of each tool bar function may be displayed by placing your mouse cursor over a specific icon. MAINTAIN PASSWORDS SCREEN The MAINTAIN PASSWORDS screen allows you to add, delete or modify password records in the password table of the Device Manager database. Since passwords must be defined within a user group, you must first scroll to the proper entry in the user group window on the left side of the screen. Once a user group has been selected, all passwords associated with that user group will appear in the password window on the right side of your screen. You may then add, delete or modify password records. A password record is comprised of the following fields: * Password - Alpha numeric field of 10 characters or less. * Level - Numeric field of 1 character. The tool bar below the password window provides icons for addition, deletion or modification of records. A description of each tool bar function may be displayed by placing your mouse cursor over a specific icon. MAINTAIN CALLER IDs SCREEN The MAINTAIN CALLER IDs screen allows you to add, delete or modify Caller ID records in the Caller ID table of the Device Manager database. Since Caller IDs must be defined within a user group, you must first scroll to the proper entry in the user group window on the left side of the screen. Once a user group has been selected, all Caller IDs associated with that user group will appear in the Caller ID window on the right side of your screen. You may then add, delete or modify Caller ID records. A Caller ID record is comprised of the following fields: * Caller ID - Numeric field of 10 characters (area code + 7 digit number). * Level - Numeric field of 1 character. The tool bar below the Caller ID window provides icons for addition, deletion or modification of records. A description of each tool bar function may be displayed by placing your mouse cursor over a specific icon. REVIEW AUDIT RECORDS SCREEN The REVIEW AUDIT RECORDS screen allows you to review and manage audit trail records that have been retrieved from the non-volatile audit trail of remote security devices. All retrieved records are maintained in the audit record table of the Device Manager database. Reviewing Records - To review the retrieved audit records of a specific device, perform the following steps: * Select the required user group from the user group window in the upper left corner of the screen. * Select a specific device from the selected user group through the device window in the upper right corner of the screen. The audit record window in the lower right portion of the screen will then display all retrieved audit records. Exporting Audit Records - Select the EXPORT AUDIT RECORDS button to initiate an operation that will append the entire contents of the Device Manager audit record table (all records for all devices in all groups) to a table called ARCHIVE.DB. CAUTION: The EXPORT AUDIT RECORDS operation does not delete the contents of the Device Manager audit record table. Therefore, duplicate archive records will be created if EXPORT AUDIT RECORDS is initiated more than once. The format of ARCHIVE.DB is discussed in a later section of this manual. Clearing Audit Records For a Specific Device - To delete the retrieved audit records of a specific device from the Device Manager audit record table, perform the following steps: * Select the required user group from the user group window in the upper left corner of the screen. * Select a specific device from the selected user group through the device window in the upper right corner of the screen. The audit record window in the lower right portion of the screen will then display all retrieved audit records. * Select the CLEAR DEVICE AUDIT RECORDS button to delete all audit records for the selected device. Clearing Audit Records For All Devices - Select the CLEAR ALL AUDIT RECORDS button to initiate an operation that will delete the entire contents of the Device Manager audit record table (all records for all devices in all groups). UPLOAD AUDIT RECORDS SCREEN Through this screen, you may upload audit trail records from any single security device or all security devices within a group. Uploaded audit trail records will be stored in the audit record table of the Device Manager database. Uploading From a Specific Device - To upload audit records from a specific device, perform the following steps: * Select the required user group from the user group window in the upper left corner of the screen. * If password protection is enabled in the remote device, enter the level 3 password that Device Manager must use to gain access to the selected device. * Select a specific device through the device window on the right portion of the screen. * Select the UPLOAD FROM SELECTED DEVICE button. Uploading From All Devices in a Group - If you wish to upload audit records from all devices in a group, perform the following steps: * Select the required user group from the user group window in the upper left corner of the screen. * If password protection is enabled in the remote devices, enter the level 3 password that Device Manager must use to gain access to all selected devices. * Select the UPLOAD FROM ALL DEVICES button. Monitoring Upload Status - Once an upload operation has been initiated, progress may be monitored through the small status window in the lower left portion of the screen. Device Manager will also post the status of its interaction with each device. This status will be displayed in the L_STAT (last status) field of the device window. If Device Manager is successful in uploading all audit trail records from a device, the L_STAT field for that device will display "DONE". If an upload operation does not complete successfully, the L_STAT field will display "FAIL". The L_STAT field is not cleared automatically by Device Manager. Use the CLEAR STATUS button to reset L_STAT after all corrective actions have been taken. DOWNLOAD PASSWORDS SCREEN Through this screen, you may download password records to any single security device or all security devices within a group. CAUTION: The download password operation deletes all passwords from the remote device before downloading new password records from the password table of the Device Manager database. Therefore, it is important to verify that the Device Manager password table has been configured with the level 2 and level 3 passwords that will be required for future access and maintenance. Downloading to a Specific Device - To download password records to a specific device, perform the following steps: * Select the required user group from the user group window in the upper left corner of the screen. * If password protection is enabled in the remote device, enter the level 3 password that Device Manager must use to gain access to the selected device. * Select a specific device through the device window on the right portion of the screen. * Select the DOWNLOAD SELECTED DEVICE button. Downloading to All Devices in a Group - If you wish to download password records to all devices in a group, perform the following steps: * Select the required user group from the user group window in the upper left corner of the screen. * If password protection is enabled in the remote devices, enter the level 3 password that Device Manager must use to gain access all selected devices. * Select the DOWNLOAD ALL DEVICES button. Monitoring Download Status - Once a download operation has been initiated, progress may be monitored through the small status window in the lower left portion of the screen. Device Manager will also post the status of its interaction with each device. This status will be displayed in the L_STAT (last status) field of the device window. If Device Manager is successful in downloading all password records to a device, the L_STAT field for that device will display "DONE". If a download operation does not complete successfully, the L_STAT field will display "FAIL". The L_STAT field is not cleared automatically by Device Manager. Use the CLEAR STATUS button to reset L_STAT after all corrective actions have been taken. UPLOAD PASSWORDS SCREEN Through this screen, you may upload and review password records from a single security device within a group. Uploaded password records are stored in a temporary table of the Device Manager database and the contents of this table are automatically erased when the screen is closed. Since the upload passwords operation is provided for review purposes only, it does not modify the password file of the remote device. Uploading From a Specific Device - To upload password records from a specific device, perform the following steps: * If password protection is enabled in the remote device, enter the level 3 password that Device Manager must use to gain access to the selected device. * Select the required user group from the user group window. * Select a specific device through the device window. * Select the UPLOAD FROM SELECTED DEVICE button. Monitoring Upload Status - Once an upload operation has been initiated, progress may be monitored through the small status window in the lower left portion of the screen. DOWNLOAD CALLER IDs SCREEN Through this screen, you may download Caller ID records to any single security device or all security devices within a group. CAUTION: The download Caller ID operation deletes all Caller ID records from the remote device before downloading new Caller ID records from the Caller ID table of the Device Manager database. Therefore, it is important to verify that the Device Manager Caller ID table has been configured with the level 2 and level 3 Caller ID records that will be required for future access and maintenance. Downloading to a Specific Device - To download Caller ID records to a specific device, perform the following steps: * Select the required user group from the user group window in the upper left corner of the screen. * If password protection is enabled in the remote device, enter the level 3 password that Device Manager must use to gain access to the selected device. * Select a specific device through the device window on the right portion of the screen. * Select the DOWNLOAD SELECTED DEVICE button. Downloading to All Devices in a Group - If you wish to download Caller ID records to all devices in a group, perform the following steps: * Select the required user group from the user group window in the upper left corner of the screen. * If password protection is enabled in the remote devices, enter the level 3 password that Device Manager must use to gain access all selected devices. * Select the DOWNLOAD ALL DEVICES button. Monitoring Download Status - Once a download operation has been initiated, progress may be monitored through the small status window in the lower left portion of the screen. Device Manager will also post the status of its interaction with each device. This status will be displayed in the L_STAT (last status) field of the device window. If Device Manager is successful in downloading all Caller ID records to a device, the L_STAT field for that device will display "DONE". If a download operation does not complete successfully, the L_STAT field will display "FAIL". The L_STAT field is not cleared automatically by Device Manager. Use the CLEAR STATUS button to reset L_STAT after all corrective actions have been taken. UPLOAD CALLER IDs SCREEN Through this screen, you may upload and review Caller ID records from a single security device within a group. Uploaded Caller ID records are stored in a temporary table of the Device Manager database and the contents of this table are automatically erased when the screen is closed. Since the upload Caller IDs operation is provided for review purposes only, it does not modify the Caller ID file of the remote device. Uploading From a Specific Device - To upload Caller ID records from a specific device, perform the following steps: * If password protection is enabled in the remote device, enter the level 3 password that Device Manager must use to gain access to the selected device. * Select the required user group from the user group window. * Select a specific device through the device window. * Select the UPLOAD FROM SELECTED DEVICE button. Monitoring Upload Status - Once an upload operation has been initiated, progress may be monitored through the small status window in the lower left portion of the screen. TEST DEVICES SCREEN Through this screen, you may test any single security device or all security devices within a group. The test devices operation places a call to each selected device and verifies that the remote device can answer and communicate with Device Manager. Testing a Specific Device - To test a specific device, perform the following steps: * Select the required user group from the user group window in the upper left corner of the screen. * If password protection is enabled in the remote device, enter the level 3 password that Device Manager must use to gain access to the selected device. * Select a specific device through the device window on the right portion of the screen. * Select the TEST SELECTED DEVICE button. Testing All Devices in a Group - If you wish to test all devices in a group, perform the following steps: * Select the required user group from the user group window in the upper left corner of the screen. * If password protection is enabled in the remote devices, enter the level 3 password that Device Manager must use to gain access all selected devices. * Select the TEST ALL DEVICES button. Monitoring Test Status - Once a test operation has been initiated, progress may be monitored through the small status window in the lower left portion of the screen. Device Manager will also post the status of its interaction with each device. This status will be displayed in the L_STAT (last status) field of the device window. If Device Manager is successful in testing a device, the L_STAT field for that device will display "DONE". If a test operation does not complete successfully, the L_STAT field will display "FAIL". The L_STAT field is not cleared automatically by Device Manager. Use the CLEAR STATUS button to reset L_STAT after all corrective actions have been taken. THE ARCHIVE.DB DATABASE TABLE Device Manager functions as a centralized data collection tool for the audit trail records of many remote devices. Therefore, it is often necessary to offer an export mechanism that will provide other applications with a standard interface to the data that has been collected. Since the entire Device Manager database is built on a relational model, an additional table was defined to provide this standard interface. Through the functions of the REVIEW AUDIT RECORDS screen a table named ARCHIVE.DB acts as the standard export interface between Device Manager and other environments. Unless the default directory was overridden during the install process, ARCHIVE.DB will be located in C:\Program Files\starcomm\dmgr\database. The ARCHIVE.DB table is implemented in a Paradox 5.0 for Windows format and contains the following elements: NAME FIELD TYPE ATTRIBUTES Record Number + Auto Increment Record Key Group S Short Value limited to a range of 1 - 99 Location A Alpha 25 characters Phone Number A Alpha 15 characters (numeric only) Time A Alpha 17 characters (see note 1) Password A Alpha 10 characters (see note 2) Status A Alpha 8 characters Note 1: Time provides a condensed date and time format: mm/dd/yy hh:mm:ss Note 2: Password will contain either password or Caller ID data While Device Manager provides functions for appending records to ARCHIVE.DB, it offers no facilities for deleting or modifying the contents of this table. This ensures that historical data cannot be inadvertently lost through errors in the day-to-day operation of Device Manager. CAUTION: Do not delete the ARCHIVE.DB table after processing its contents. Only the records within this table may be deleted.
|
|